As an Amazon Associate I earn from qualifying purchases.
My go-to lighting design software is MA Lighting’s dot2 software which offers a free onPC platform similar to grandMA2 with 1 free universe, however, dot2 only supports ArtNET / sACN output unless you have a MA Lighting node or console which are very expensive.
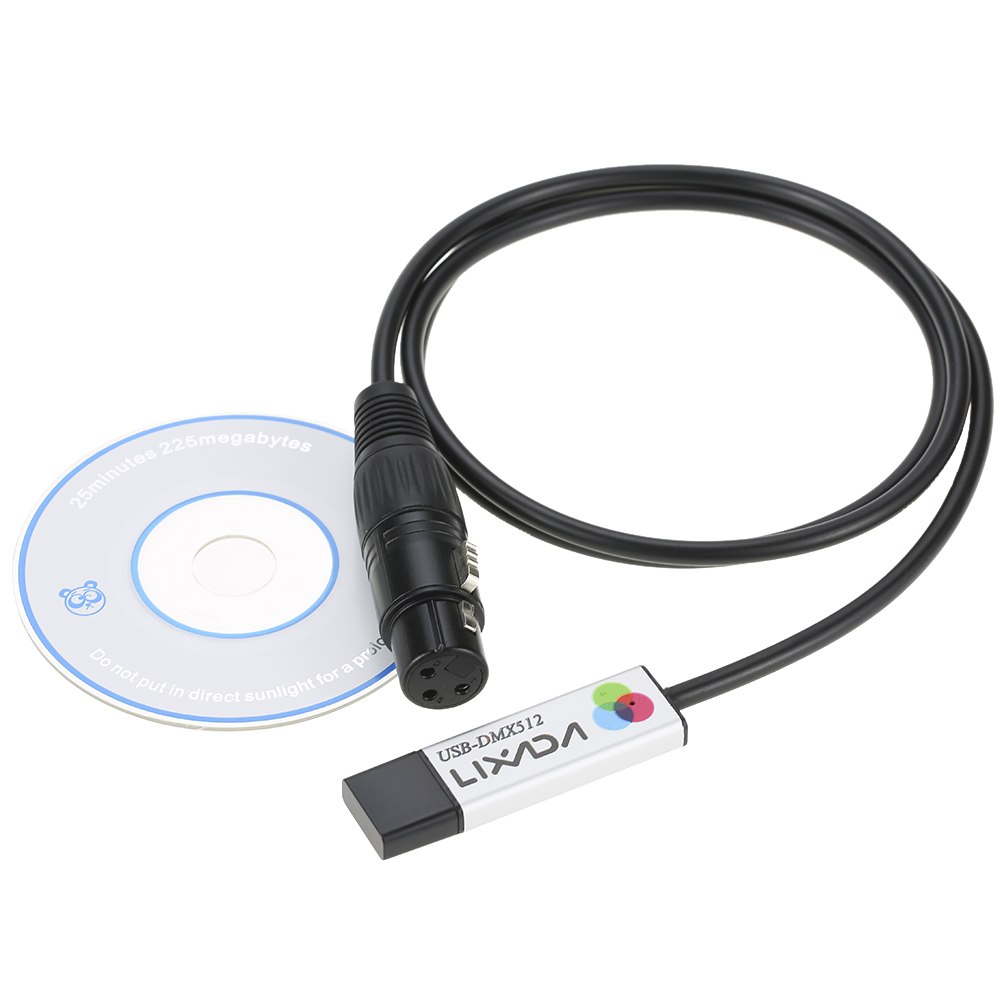
While I now use a DMXKing eDMX1 PRO as my main ArtNet node, when I first started out in light design, I used a free program called Freestyler DMX along with a cheap Lixada USB-to-DMX cable for my controller. Rather than getting rid of this when I upgraded to using dot2, I converted my USB-to-DMX cable into an ArtNet node which still comes in handy when I want to run another node or quickly hook up a universe.
In part 1 of this guide, I will be showing how to setup a generic USB-to-DMX cable as an ArtNet node, while part 2 will show how to build a more resilient enclosure for the node.
Part 1: USB to ArtNet
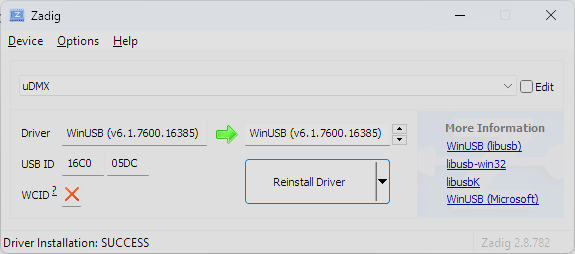
First things first, we need to make sure that our DMX adapter is using the right drivers. Windows may try to automatically install drivers for the adapter but often chooses the wrong version which may prevent it from working properly. To change the drivers, download Zadig from zadig.akeo.ie and replace the drivers for the uDMX device with the WinUSB drivers.
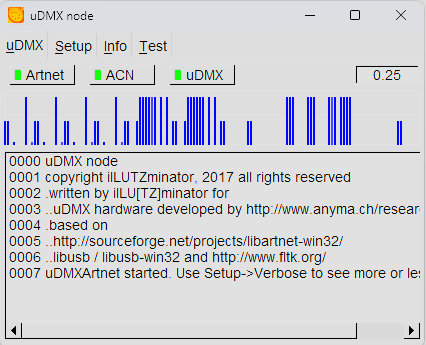
Next, we will use the uDMX Node software to use our uDMX adapter as an Art-Net / sACN node. You can obtain uDMX node here: https://www.illutzmination.de/udmxartnet.html
I’m using the Lixada USB to DMX Adapter which you can pick up on Amazon for $20, but most generic USB to DMX adapters will work and use the same uDMX protocol which is supported by this software.
Alternatively, you can use the “Art-Net to DMX converter” provided with FreeStyler DMX (freestylerdmx.be) which includes many more USB to DMX interface options, but has more limited options in networking and does not support sACN.
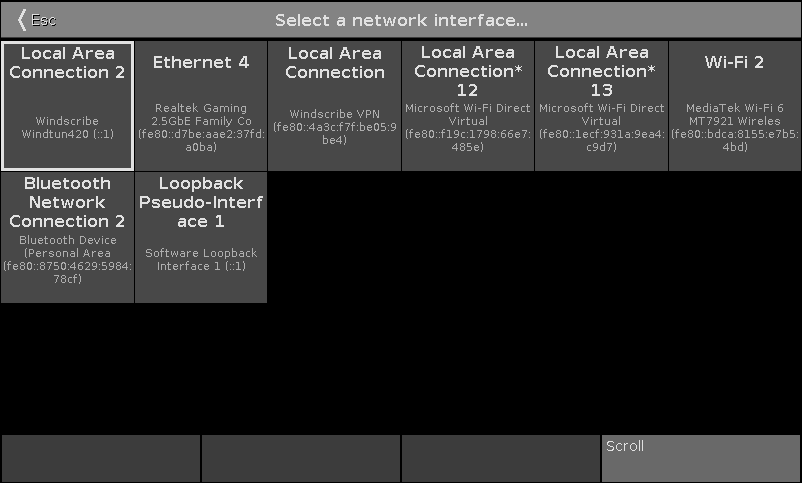
If using uDMX Node, you should be able to launch the application without changing network settings as it listens on all interfaces by default, but FreeStyler’s Art-Net to DMX converter requires you specify an IPv4 network interface. You may want to use a dedicated network interface for your ArtNet network to connect to your controller, in which case, I would recommend installing a virtual loopback interface following the instructions here: https://process.st/how-to/enable-microsoft-loopback-adapter/.
In MA dot2 or your desired control software, set your ArtNet output to the chosen network adapter. Since I am using dot2 and am using a virtual loopback interface, I will now choose this interface from dot2 under Setup -> Network Interface, choosing the “Loopback Psuedo Interface 1”
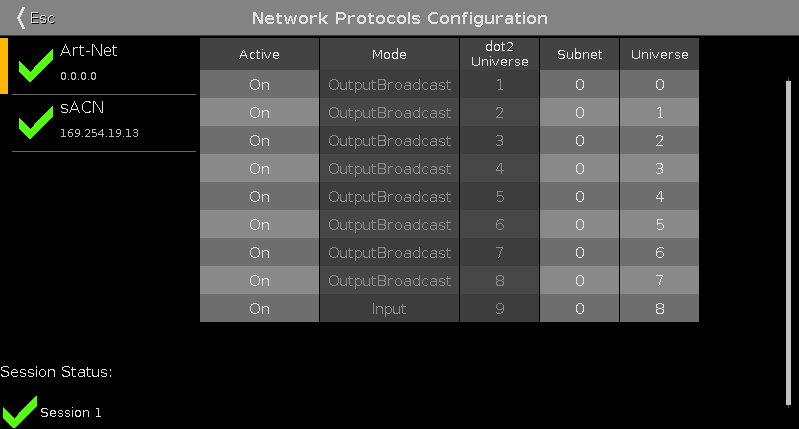
Next, in dot2 or your control software, open your output settings and enable Art-Net or sACN control like so:
Back in uDMX Node or Art-Net to DMX Converter, we should see that the Art-Net light is green showing signal being received:
That’s it! You should now have a functional Art-Net to DMX adapter using a cheap USB to DMX cable.
Part 2: USB Enclosure
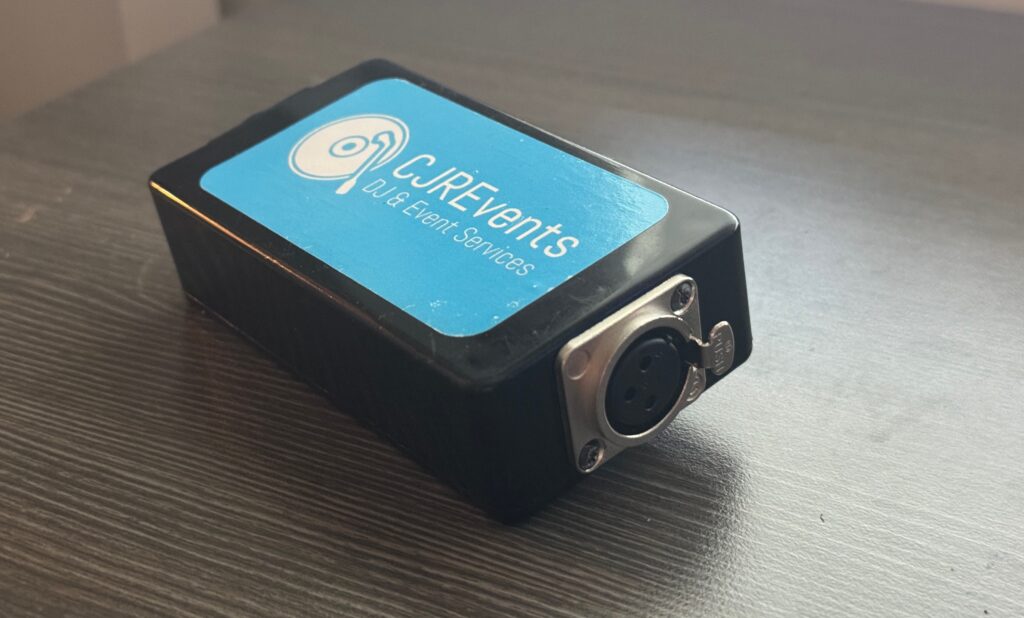
While USB adapters like the Lixada USB to DMX Adapter provide a cheap way to get DMX output from a computer, I don’t like the design as it acts like a lever sticking out of my laptop just waiting to get hit and snap the USB connector.
To solve this issue I bought a plastic project box and some D mount connectors to make a cheap enclosure around the USB cable.
To build this, I used the following parts (with prices at the time of writing):
- Lixada USB to DMX Adapter – $20.98
- Neutrik NAUSB-W Reversible USB Connector – $10.99
- Neutrik NC3FD-L-1 Female XLR Connector – $3.50
- Hammond 1591BSBK ABS Project Box – $6.90
Note that I used an XLR connector that requires soldering, but you can buy a passthrough connector for a few dollars more that will allow you to build the enclosure without any soldering, though you may need a larger project box to fit the XLR connector.
Additionally, you may need some screws to mount the D panel connectors such as these M2.5 self tapping screws.
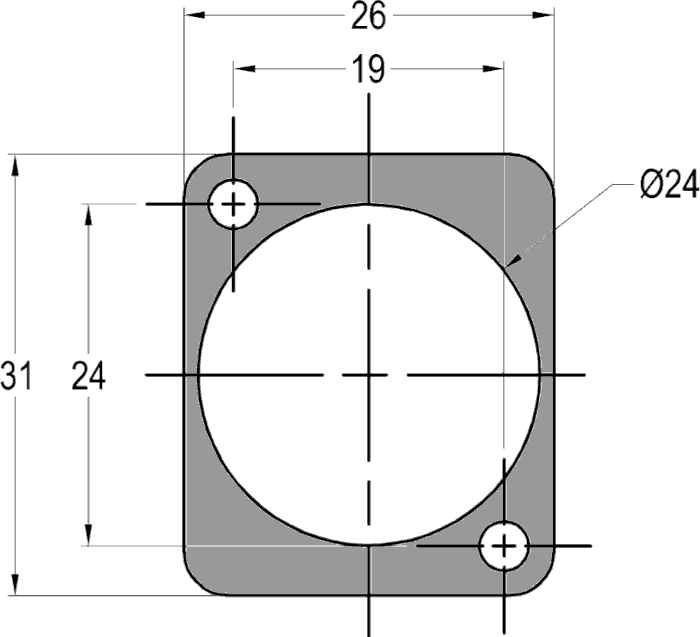
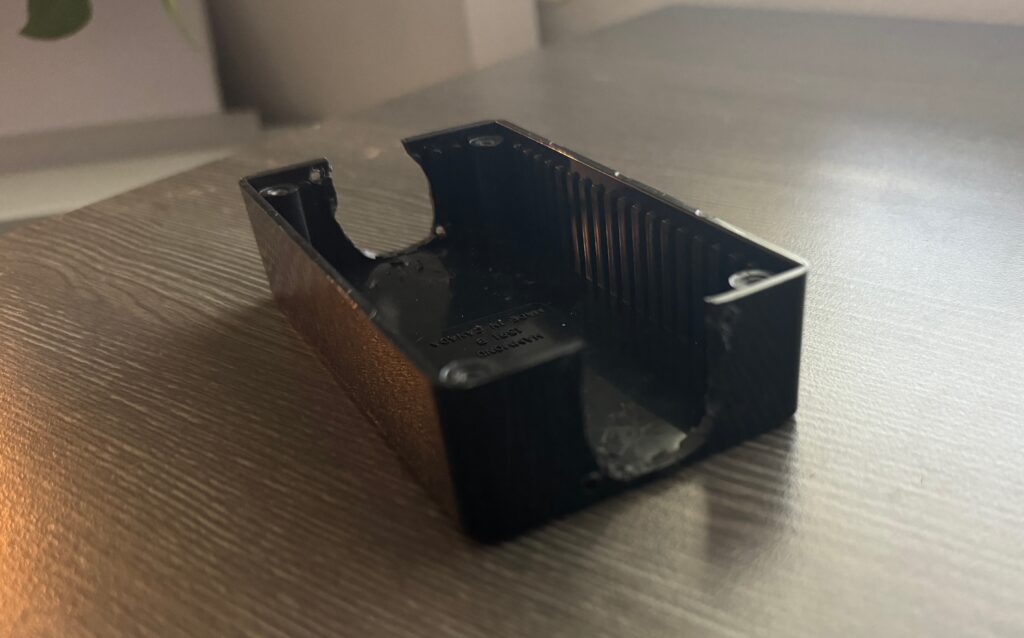
First I used a dremel to cut out two holes roughly the size of the D mount connectors (about 15/16″) on each end of the project box.
To make them fit, I also had to cut an opening at the top of the hole and notch the lid of the project box.
After reversing the orientation of the USB connector so the USB-A side was on the inside of the box and the USB-B side was on the outside, I installed the connector. I then cut off the end of the existing XLR connector and soldered the USB adapter to the D mount connector and installed it into the project box.
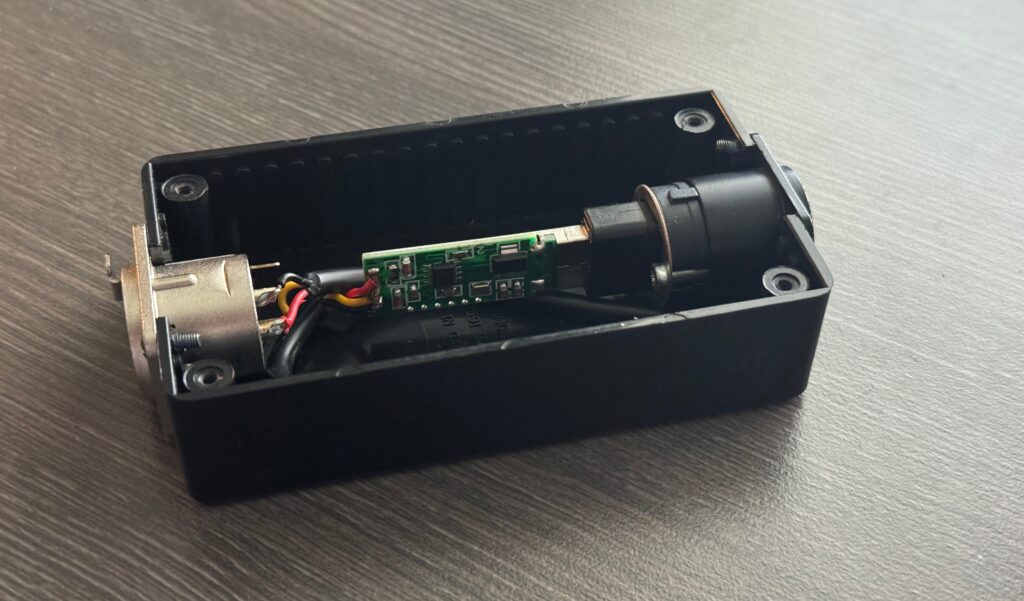
Finally, I drilled a small hold in the lid of the enclosure and filled it with hot glue so I could see the LED light on the USB when the box was closed.
That’s all. For an extra $20, now you have a nice tough enclosure for your USB to DMX adapter!